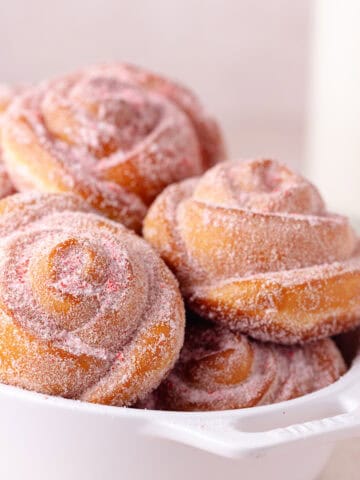
You'll want to add these delicious Small Batch Pumpkin Cheesecake Donuts to your to-do list this fall! These adorable pumpkin shaped donuts are fried to perfection (baking option notes below) and then coated in cinnamon sugar and filled with a creamy pumpkin spice cheesecake filling!

Impress your family and friends with these incredibly soft and fluffy pumpkin spice donuts! They stay soft for up to 3 days, thanks to the addition of buttermilk and real pumpkin right in the dough. And wait till you see how easy they are to make! Read on to learn more.
For more festive recipes, check out my Gingerbread Cheesecake Donuts, Pumpkin Butter Cinnamon Rolls and Cinnamon Apple Babka! Or view all my donut recipes!
Jump to:
♡ Why You Will Love These Pumpkin Cheesecake Donuts
- Flavor. There are layers and layers of flavor. There's pumpkin spice in the dough and cheesecake filling and the donuts are coated in cinnamon sugar.
- Texture. These just might be the softest and fluffiest homemade pumpkin donuts ever. The moment you sink your teeth into one, it will melt in your mouth.
- Small batch. This recipe make 6 perfectly sized donuts. However, if you would like to make these for a crowd, you can easily double the recipe.
- Pumpkin shaped. The pumpkin shape is just so cute and festive!
- Can also be baked. If you're not comfortable with frying dough, you can bake them instead. You can read the instructions in the FAQ section below.

Ingredient Notes
Here are some notes about all the ingredients used. Quantities and full instructions are in the recipe card below!

Pumpkin Donut Dough
- Yeast - I'm using dry active yeast, but you can also use instant yeast. I've included notes in the recipe card below.
- Buttermilk - Makes the donuts light and fluffy.
- Brown Sugar - A little bit of brown sugar will feed the yeast and will also be in the dough.
- Flour - We're using a combination of Bread Flour and All-Purpose Flour for the perfect chewy and soft texture.
- Pure Pumpkin Puree - Makes the donuts suuuuper soft.
- Butter - We'll be using melted butter.
- Egg - Adds structure.
- Pumpkin Spice - Adds flavor.
- Salt - A flavor enhancer.

Pumpkin Cheesecake Filling + Cinnamon Sugar Coating
- Heavy Cream - The cream will be whipped and folded into the filling.
- Cream Cheese - Adds tanginess and makes the filling creamy.
- Pure Pumpkin Puree
- Pumpkin Pie Spice - Adds flavor.
- Vanilla Paste or Vanilla Extract - Adds flavor.
- Powdered Sugar - Adds a little bit of sweetness. The great thing is you can control how much or how little to add.
- White Sugar + Cinnamon - The donuts will be coated in cinnamon sugar.
*See recipe card for quantities.
Step-By-Step Instructions
Here are step-by-step photos and instructions on how to make these Pumpkin Spice Cheesecake Donuts! Please find detailed instructions in the recipe card at the end of this post.

Step 1. Bloom the Yeast - In a large bowl or stand mixer, add warm buttermilk, 1 teaspoon of brown sugar and active dry yeast. Stir well to combine and let bloom for 5 to 7 minutes.

Step 2. Combine all Ingredients - To the frothy yeast mixture, add bread flour, all-purpose flour, melted butter, egg, pumpkin puree, pumpkin spice and salt.
💡TIP! If you are using instant yeast, there is no need to activate it. Just combine all the dough ingredients into your mixing bowl, making sure your buttermilk is warm.

Step 3. Knead the Dough - With a spoon, mix the ingredients together until it becomes a shaggy ball. Fit your stand mixer with the dough hook attachment and knead on medium/high speed for about 15 minutes.
If kneading by hand, turn everything out onto a work surface and knead for up to 20 minutes.

Step 4. Window Pane Test - The dough is properly kneaded when it's passes the window pane test.
Take a small ball of dough and stretch it thin enough to let light pass through without tearing. If it tears, knead for an additional 1 to 2 minutes.


Step 5. Let Double in Size - Form the dough into a ball and then place it into a lightly oiled bowl (I used the same stand mixer bowl). Cover with plastic wrap and allow to rise in a warm place for an hour or until it doubles in size.
💡TIP! Add a piece of tape on the side of the bowl to monitor the dough as it rises. With small batch baking, sometimes it's hard to tell when the dough has doubled in size, so having a guide is helpful.

Step 6. Divide the Dough - Using a kitchen scale, divide the dough into 6 equal pieces.

Step 7. Release the Gas Bubbles - Grab a piece of dough and press it flat to get rid of any air bubbles.

Step 8. Gather the Edges - Gather and pinch the edges together and then place it on your work surface seam side down.

Step 9. Roll into a Smooth Ball - Form your hand into a relaxed “claw” shape and cup it over the ball of dough. Then move your hand in small circular motions, gently dragging the ball along. It will tighten and the top will become smooth. You can check out my video here!
How To Shape Pumpkin Donuts
Step 10. Shape one donut at a time and cover the rest with plastic wrap to prevent them from drying out.
Position a piece of twine horizontally on a work surface. Place a bun on top of the twine, seam side down. Bring the ends of the twine together and then twist it over the center of the dough vertically, creating a quadrant.
Gently flip the bun over and tie 2 knots. Flip it back over (seam side down) and repeat the process one more time. This will create a total of 8 sections.

Step 11. Place donuts on parchment paper squares and transfer to a large baking tray. Loosely cover with plastic wrap that has been sprayed with a bit of oil and allow to rise for about 45 minutes or until it passes the “poke” test. It may take less time if you are using instant yeast, so check after 25 minutes.


💡TIP! Proofing - The warmer the kitchen, the quicker the donuts will fully proof. When I use dry active yeast, it generally takes about 40 to 45 minutes. In order to know when the donuts are done, you should perform a "poke" test. Gently press your pointer finger on to the dough and if it springs back slowly and leaves a slight indentation, then it’s ready to be fried. If the dough bounces back immediately, then it needs more time.

Step 12. Make Pumpkin Spice Cheesecake Filling - In a small bowl or measuring cup, whip the heavy cream until it reaches stiff peaks. Set aside.

Step 13. In a medium bowl, add cream cheese, pumpkin puree, pumpkin pie spice and vanilla. Whisk until smooth.

Step 14. Sift in powdered sugar and mix until combined.

Step 15. Gently fold in the whipped cream until combined. Transfer to a piping bag and set in the fridge until needed.

Step 16. Fry the Donuts - Once the oil reaches 350ºF (176ºF), fry 2 donuts at a time for 1 minute and 30 seconds on each side.

Step 17. Remove the Butcher's Twine - Transfer fried donuts to a cooling rack lined with paper towels. When it's cool enough to handle, carefully cut and remove the twine with kitchen shears.
💡TIP! When frying donuts, it’s important to monitor the oil by using a thermometer. You’ll want it to be between 350ºF to 360ºF (176ºC to 182ºC). If the oil gets too hot, just turn the burner to low or off to bring the temperature down. Alternatively, if it dips too low, turn the burner up and then proceed with frying once it’s to temp.

Step 18. Coat the Donuts - Coat the pumpkin donuts in the cinnamon sugar mixture and shake off the excess.

Step 19. Fill the Donuts - Create a hole in the top center of the donuts and fill with the pumpkin cheesecake filling. For a festive touch, garnish with cinnamon sticks. Serve and enjoy!

Substitutions
- Bread Flour - If you don't have bread flour in your pantry, you can just use all-purpose flour. Keep in mind that you may need to add a bit more AP flour because bread flour (high protein) absorbs more liquid.
- Yeast – I almost always only use Active Dry Yeast, but you can also use instant yeast. If using instant yeast, there is no need to activate it in buttermilk. Just combine all of the dough ingredients together into the mixing bowl and proceed as written. You'll still want to warm your buttermilk though.
- Buttermilk - If you do not have any on hand, you can substitute by mixing ¼ cup of whole milk with ½ teaspoon of vinegar or lemon juice. Allow to curdle for 10 minutes before using. You can also just use plain whole milk if you’re in a pinch.
- Pumpkin Pie Spice - If you don't have pumpkin pie spice, you can make a simple blend by combining, 2 teaspoons ground cinnamon, 1 teaspoon ground ginger, ¾ teaspoon ground nutmeg and ½ teaspoon ground cloves or allspice. You can play around with the blend.
Variations
- Traditional Shape - If you'd like to make regular round donuts, you can skip the butcher twine part.
- Other Fillings - Nutella and cookie butter are great alternative fillings. With Halloween around the corner, you can also fill these donuts with a fruit jelly or jam.
- Other Coatings - You can coat them in powdered sugar, pumpkin spice sugar, or plain white sugar.
- Unfilled - These donuts are delicious even without the filling. Feel free to just coat it in cinnamon sugar and keep it unfilled.
- Make Savory Pumpkin Rolls - Omit the pumpkin spice and replace the brown sugar with white sugar. Bake them at 350ºF (176º) for 16 to 20 minutes and then brush them with a garlic herb butter. You can also fill them with a delicious herbed cream cheese as seen here in my Raw Tomato Tart. You'll just need a half batch!
Helpful Equipment
- Electric Mixer - While having a stand mixer is extremely helpful, you can also knead by hand. Please see directions in the FAQ section below.
- Thermometer - Having a thermometer that can clip to the side of the pot is crucial in order to monitor the temperature of the oil as you fry.
- Kitchen Scale - It’s helpful to have when measuring ingredients accurately.
- Butcher's Twine - If you would like pumpkin shaped donuts, you will need butcher's twine.
Storage
- Room Temperature - Unfilled Donuts can be stored in an airtight container for up to 3 days on the counter.
- Refrigerator - Filled Donuts can be stored in an airtight container for 3 to 4 days in the fridge. Allow to come to room temperature before serving.
💡Expert Tips!
Use a kitchen scale to weigh all your ingredients. Baking in grams rather than in volume, is the best and most accurate way to bake! All my recipes include gram conversions based on King Arthur's Weight Chart.
If you are not using a kitchen scale, measure your flour correctly. Fluff and aerate your flour first, then spoon into your measuring cup and finally level off with the back of a butter knife. Do not pack it in as it will add too much flour.
Make sure your yeast is fresh. If you are unsure, check by blooming a tiny bit of active dry yeast or instant yeast in warm liquid with a bit of sugar. Nothing is worse than continuing on with a recipe, and then discover later that your yeast is dead.
Kneading your dough until it passes the window pane test. To perform the test, take a small (2 tbsp) ball of dough and stretch it thin enough to let light pass through without tearing it. If it tears, knead for an additional 1 to 2 minutes.
Perform a “poke” test to know your donuts are properly proofed! Gently press your pointer finger into the dough and if it springs back slowly and leaves a slight indentation, it’s ready to be fried. If the dough bounces back immediately, then it needs more time.
Use a thermometer to consistently check the oil’s temperature. It can rise and lower as you move through the frying process. Keep a close eye on the temperature to ensure it stay between 350ºF to 360ºF (176ºC to 182ºC). If the temperature of your oil is too low, your donuts run the risk of absorbing too much oil and if the oil is too hot, the donuts will brown too quickly and the center can be uncooked.
Be prepared before you start frying your donuts. After the donuts are done proofing, this recipe moves quickly. Have your oil heated to temperature with a thermometer clipped to your pot, a cooling rack lined with paper towels and your filling and coating ready.

FAQ
Yes, there is no need to activate or bloom the instant yeast in warm buttermilk. Just combine all of the dough ingredients into your mixing bowl and proceed with the recipe. Make sure your buttermilk is warm though. Your rise and proof time will be a little shorter.
Yes, you can! You can knead by hand for up to 20 minutes or until it passes the window pane test. While kneading, it can get quite sticky, but refrain from adding too much flour. You can lightly oil your hands and use a plastic bench scraper to help move the dough around. Keep at it and eventually the dough will become smooth and less sticky.
Perform a “poke” test to know when your donuts are properly proofed! Gently press your pointer finger into the dough and if it springs back slowly and leaves a slight indentation, then it’s ready to be fried. If the dough bounces back immediately, then it needs more time.
Yes, you do. The donuts will deflate if you try to cut them before frying.
I like to use vegetable shortening, but you can use any oil with a high smoke point such as avocado oil (very expensive though), grapeseed oil, canola oil, vegetable oil or sunflower oil.
Yes! You can brush the buns with an egg wash or milk and bake on a parchment-lined baking sheet at 350ºF (176ºC) for 16 to 20 minutes. It's ready when the internal temperature reaches 200ºF (93ºC). Remove the twine and brush the buns with melted butter, then coat with cinnamon sugar. Fill and enjoy!
Allow the oil to cool completely in the pot, then pour back into its container or a plastic bag and throw it away in the trash. It should never be poured down the drain, as it could potentially clog your pipes.

More Pumpkin Recipes
Did you try this recipe? Please consider leaving a 5-star rating and review below and tag me on Instagram @shortstackkitchen. This provides helpful feedback to myself and other readers. Thank you so much!
📖 Recipe

Small Batch Pumpkin Cheesecake Donuts
- Total Time: 2 Hours + 40 Minutes
- Yield: 6 Donuts
Description
You'll want to add these delicious Small Batch Pumpkin Cheesecake Donuts to your to-do list this fall! These adorable pumpkin shaped donuts are fried to perfection and then coated in cinnamon sugar and filled with a creamy pumpkin spice cheesecake filling!
Ingredients
Pumpkin Donut Dough
- ¼ Cup (56g) Buttermilk, warmed to 105ºF (40ºC)
- 1 ⅛ Teaspoon (4g) Dry Active Yeast
- 2 Tablespoons + 1 Teaspoon Brown Sugar, divided
- 1 Cup (120g) Bread Flour + 1 to 2 tablespoons if needed
- 1 Cup (120g) All-Purpose Flour
- ¼ Cup (56g) Pure Pumpkin Puree
- 2 Tablespoons (28g) Unsalted Butter, melted
- 1 Whole Large Egg, room temp
- 1 Teaspoon Pumpkin Pie Spice
- ½ Teaspoon Fine Salt
Pumpkin Pie Cheesecake Filling
- ¼ Cup (56g) Heavy Cream, cold
- 3 Ounces (85g) Cream Cheese (from the Block)
- 2 Tablespoons (28g) Pure Pumpkin Puree
- ¾ Teaspoon Pumpkin Pie Spice
- ½ Teaspoon Vanilla Paste or Extract
- ½ Cup (56g) Powdered Sugar
Coating
- ⅓ Cup (67g) White Sugar
- ½ Teaspoon Cinnamon
For Frying
- 2 Quarts (1.89 liters) Frying Oil (canola, vegetable or shortening)
Instructions
- Bloom the Yeast - In a large mixing bowl or bowl of a stand mixer, add warm buttermilk, 1 teaspoon of brown sugar and active dry yeast and stir well to combine. Let bloom for 5 to 7 minutes. see note below for instant yeast
- Combine all Ingredients - To the frothy yeast mixture, add bread flour, all-purpose flour, melted butter, egg, pumpkin puree, pumpkin spice and salt. With a spoon or spatula, mix all the ingredients together until it becomes a shaggy ball.
- Knead the Dough - Fit your stand mixer with the dough hook attachment and knead on medium/high speed for about 15 minutes or until it passes the window pane test. If it's a bit sticky, you can gradually add 1 to 2 tablespoons of bread flour. see notes below for kneading by hand and window pane test
- Let Double in Size - Form dough into a ball, then place into a lightly oiled bowl (I used the same stand mixer bowl). Cover with plastic wrap and allow to rise in a warm place for about an hour or until it doubles in size. If using instant yeast, it will take less time.
- Prep the Parchment Squares & Twine - When the dough has almost doubled in size, cut out 6, 4x4 inch (10x10 cm) parchment paper squares. Then cut 12, 16-inch (40 cm) long pieces of butcher's twine and set aside.
- Divide the Dough - Gently deflate the dough and transfer it onto a lightly floured work surface. Cut the dough into 6 equal pieces. Weigh the entire dough with a kitchen scale and then divide that number by 6. Mine came out to 76 grams per piece.
- Roll into Smooth Balls - Grab a piece of dough and press it flat to get rid of any air bubbles. Gather and pinch the edges together and then place it on your work surface seam side down. Form your hand into a relaxed “claw” shape and cup it over the ball of dough. Then move your hand in small circular motions, gently dragging the ball along. It will tighten and the top will become smooth. Please see the photos in the body of the post as a reference.
- Shape the Pumpkin Donuts - Shape one donut at a time and cover the rest with plastic wrap to prevent them from drying out. Position a piece of twine horizontally on a work surface. Place a bun on top of the twine, seam side down. Bring the ends of the twine together and then twist it over the center of the dough vertically, creating a quadrant. Gently flip the bun over and tie 2 knots. Flip it back over (seam side down) and repeat the process one more time. This will create a total of 8 sections. Finish shaping the rest of the dough. Please see the photos in the body of the post as a reference.
- Allow Donuts to Proof - Place donuts on parchment paper squares and transfer to a large baking tray. Loosely cover with plastic wrap that has been sprayed with a bit of oil and allow to rise for about 45 minutes or until it passes the “poke” test. It may take less time if you are using instant yeast, so check after 25 minutes.
- Make Pumpkin Cheesecake Filling - In a small bowl or measuring cup, whip the heavy cream until stiff peaks form; set aside. In a medium bowl, add cream cheese, pumpkin puree, pumpkin pie spice and vanilla and whisk until smooth. Then sift in the powdered sugar and mix until combined. Finally, gently fold in the whipped cream until combined. Transfer the filling to a piping bag and set in the fridge until needed. You can also use a ziploc bag and snip off the corner later when you fill the donuts.
- Combine the Coating - In a shallow bowl, combine ⅓ cup granulated sugar and ½ teaspoon ground cinnamon. Set aside.
- Prep Frying Oil - Fill a medium sized pot with at least 2 inches of frying oil. Attach a candy thermometer to the side of the pot and heat the oil over medium/high heat.
- Fry the Donuts - Once the donuts are proofed and the oil reaches 350ºF (176ºF), carefully place 2 donuts into the hot oil with the parchment paper. After a few seconds, use tongs and remove the papers. Fry for 1 full minute on each side. Then flip the donuts and fry for an additional 30 seconds on each side. Set a timer!
- Remove the Butcher's Twine - Transfer the fried donuts onto a cooling rack lined with paper towels. When it's cool enough to handle, carefully cut and remove the twine with some kitchen shears.
- Coat the Donuts - Coat the pumpkin donuts in the cinnamon sugar mixture and shake off the excess.
- Fill the Donuts & Serve - Create a hole in the top center of the donuts and fill with the pumpkin cheesecake filling. For a festive touch, garnish with cinnamon sticks. I used pruning shears to make a clean cut with the cinnamon sticks. Serve and enjoy!
Notes
Instant Yeast - If you are using instant yeast, there is no need to activate it. Just combine all the dough ingredients into your mixing bowl, making sure your buttermilk is warm. Keep in mind your rise and proof time will be a little shorter.
Kneading by Hand - Turn out the shaggy dough onto a work surface and knead my hand for up to 20 minutes or until it passes the window pane test. While kneading, it can get quite sticky, but refrain from adding too much flour. You can lightly oil your hands and use a plastic bench scraper to help move the dough around. Keep at it and eventually the dough will become smooth and less sticky.
Window Pane Test - The dough is properly kneaded when it's passes the window pane test. Take a small ball of dough and stretch it thin enough to let light pass through without tearing. If it tears, knead for an additional 1 to 2 minutes.
Donut Shape - If you'd like a traditional bun donut shape, you can skip step 7 and continue onto step 8.
Be prepared before you start to fry - After the donuts are done proofing, this recipe moves quickly. Have your oil heated to temperature with a thermometer clipped to your pot, a cooling rack lined with paper towels and your filling and coating ready.
Storage - Unfilled Donuts can be stored in an airtight container, on the counter for up to 3 days. Filled Donuts can be stored in an airtight container, in the fridge for 3 to 4 days. Allow to come to room temperature before serving.
- Prep Time: 45 Minutes
- Rise/Proof Time: 1 Hr + 45 Minutes
- Cook Time: 9 Minutes Total


Ani L says
Finally got around to making these over the weekend! Not as pretty as yours but they sure tasted fantastic! 😂 Cutting the strings off was a bit tricky because of how soft and light they were, but I prevailed! The kiddos had fun coating and filling them… the filling was yummers btw!! We ate every single donut in one sitting!! 😋 Can’t wait to make them again!
Lisa says
Yay, I'm so happy you decided to give this recipe a try! It's one of my favorite donut recipes. Thank you for your wonderful review, Ani! 😊
Erica L says
My family and I adore these pumpkin donuts! The small batch is great for our small family! So cute, yummy and o so soft!
Lisa says
I love hearing that! Thank you so much for trying this recipe and for your wonderful feedback! ❤️